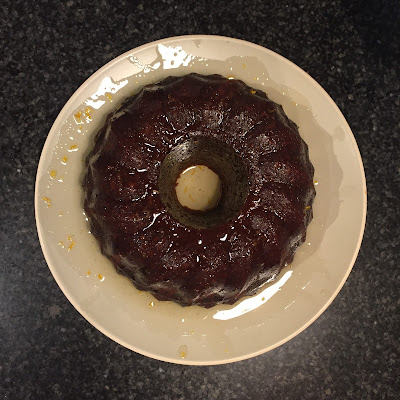
Playdough

Easily the best Playdough I have made, it turns out extremely smooth and is really quick to make, I can make 3 batches in 10 minutes, that 1.5kgs of Playdough!!!


What you need...

  • 1 cup of water
  • 1/2 cup of salt
  • 1 tablespoon cream of tartar
  • 1 tablespoon vegetable oil
  • Food colouring of your choosing 
  • 1 cup of plain flour 
How you do it...
  • In a saucepan over a low to medium heat, heat up the water, salt, cream of tartar, oil and your food colouring {add as much or as little colouring as you like, the more you add the brighter the playdough}, do not let it boil just heat it enough so the salt starts to dissolve, this will take between 2 and 4 minutes.
  • Take is off the stove and pour into a heat proof mixing bowl.
  • Add the cup of flour and using a spatula mix and fold into the liquid.  It will seem too wet to start with, but resist the urge to add more flour, within a minute it will start to thicken up.
  • Tip it out onto a floured bench to and kneed it until it is completely smooth.  It will be quite hot to start with so please be careful and not let you're children help out until it has cooled down.
  • Once cooled store in and airtight container for up to 6 months Enjoy!!!
* One quantity make 500 grams of play dough


Potato Top Pie ***Low FODMAP & Gluten Free***

What you need...

Pastry...
  • 100 grams unsalted butter, at room temperature and cut into cubes.
  • 200 grams gluten free plain flour, I just used a pre mixed GF plain flour from the supermarket
  • 6 tablespoons cold water
Meat filling...
  • 500 grams good quality beef mince
  • 1 carrot, diced
  • 1 stick of celery, diced
  • Green tops of 4 or 5 spring onions
  • 1 50 gram sachet of tomato paste
  • 2 beef stock cubes, I use Massel 7's which is onion and garlic free
  • 1 cup of water
  • 1 teaspoon wholegrain mustard
  • Thyme, roughly the leaves of 4 sprigs.
  • Salt & pepper, a few shakes of each to season
  • 1 tablespoon G.F plain flour
Mash Potato top...
  • 4 large potatoes
  • Slash of milk
  • 1 teaspoon of butter
How you do it...
The best place to start is to make the pastry first, then while it is resting in the fridge move onto making the meat filling and start boiling the potatoes.  Once the meat and potatoes are bubbling away its time to start blind baking the pastry and forming the pies crust.  Now you've got the order in which you need to do things, let look at exactly how you do it.

Pastry...
  • Pre heat your oven to 180ºC and Grease your pie dish, I just use cooking spray on mine
  • In a large bowl place the flour and the butter.  Rub the butter into the flour until you get a crumb.
  • Add water and use a knife to bring it together.
  • Roll the dough into a ball with your hands and wrap it in some cling film.  The dough will still be quite wet at this stage.
  • Pop into the fridge for 30 mins. {move onto the meat filling here}
  • After the dough has rested in the fridge it will be a better consistency for rolling out, but the nature of gluten free dough is still a little wetter than normal dough, so i recommend rolling it out on some baking paper and using a well dusted rolling pin.   Roll out dough to about 5mm in thickness.  
  • As the dough can be quite fragile I found the best way to get it into the pie dish is to pick up the baking paper with the rolled out dough on it and flip it over straight into the dish, peel the baking paper off and push the dough into the dish, trim off any over hanging edges 

  • Place another piece of baking over the dough and weight it down with some rice, pop into the oven for 15 mins to blind bake.
  • Take the pie crust out of the oven and carefully remove the baking paper and rice, pop the crust back into the oven for 10 more mins.
Meat filling...
  • Heat up some olive oil in a large pot and brown off your beef mince
  • Add in the carrot, celery and spring onion, fry off for a 1 min or 2
  • Add in the rest of the ingredients and simmer for 30 mins
  • Let cool for 5 mins before filling the pie.
Mash Potato top...
  • Boil the potatos until completely soft
  • Drain water and use a fork to smash them up
  • then add the butter and milk and use a potato masher to mash it all together
Once everything is ready, fill the pie crust with the meat filling and cover it withe the mashed potato. then Bake in the oven for 30 minutes.

Cover in tomato sauce, serve with greens and enjoy!


Ginger Cake with Lemon Syrup Glaze


A few nights ago my husband and I were chatting about nothing in particular and I told him a story about an old hairdressing client that use to come into the salon I worked in, sometimes when she came in she would bring us Ginger cake with thick creamy lemon icing that her husband had baked.  The very next day while doing the gorcery shopping I randomly bought a new super cute Bunt tin.  When I got home I realised that the stars had aligned and I was just meant to make a Ginger Cake in the bunt tin!  Thank you Baking gods.....

What you need...
Ginger Cake
  • 1/4 cup of warm water
  • 3/4 cup of cool water
  • 2 teaspoons bicarb soda
  • 1 cup of caster sugar
  • 1 cup of vegetable oil
  • 1 cup of golden syrup
  • 3 eggs
  • 1 1/2 tablespoons powdered ginger
  • 2 teaspoons cinnamon
  • 2 teaspoons mixed spice
  • 3 cups plain flour
Lemon Syrup
  • zest of 2 large or 3 small lemons
  • 1/3 cup fresh lemon juice
  • 2 tablespoons water
  • 3/4 cup caster sugar
How you do it...
Ginger Cake
  • Pre-heat the oven to 180ºC, grease a bunt tin.
  • In a large bowl place the bi-carb soda and the warm water, give it a mix around so the bi-carb dissolves, then add in the cool water.
  • Add all other ingredients and beat well with an electric mixer.
  • Once smooth and lighter in colour pour into your bunt tin
  • Bake for around a hour, checking that it cooked through by picking with a skewer or knife, making sure it comes out clean.
  • Once baked, take out of the oven and let cool for 5-10 minutes in the tin before turning it out onto your cooling rack.  When fully cooled cut off any excess cake from the bottom so it will sit flat on your plate.
Lemon Syrup
  • Pop all ingredients into a small saucepan, and place onto a low to medium heat.
  • Once all the sugar has dissolved let it simmer for 5 min.
  • remove from the heat and let cool and thicken up for a few minutes.


Once the cake is cool and your Lemon Syrup is ready, carefully pour the syrup all over the cake, this can be pretty messy so its best to do it on a different plate to what you will be serving it on, unless you love the messy gooieness of it all.


Rainbow Bath Bombs


What you need for 4 Bath Bombs...

  • 1 cup of Bi-Carb Soda
  • 1/2 cup Cornflour
  • 1/2 Citric Acid
  • 1/2 Epsom Salt
  • 5 Tablespoons melted Coconut oil
  • 4 teaspoons fragrance oil 
  • A few drops of food colouring
  • Water, depending on how dry the mixture is you may or may not need a teaspoon or so of water to help the dampen the mixture for binding.
  • A plastic mould
  • Disposable gloves

How you do it...

  • Put gloves on!!
  • Whisk together the bi-carb soda, cornflour, citric acid and epsom salt in a medium bowl, then divide the mix equally into 3 separate bowls 
  • Mix to together the coconut oil and your chosen fragrance, then divide equity into three separate bowl, colour each oil mix a different colour, I chose blue, pink and yellow.
  • Slowly add one bowl of the wet mixture into one bowl of dry mix.  It is is important to do this slowly and to only add small amounts at a time so you don't cause the bi-carb and citric acid to fizz up, you want to save that reaction for the bath! After each time you add in some oil use you hands to mix it around.                                         
  • Once all the oil is added in you should have a mixture with the consistency of damp sand, and it should hold it's shape when you squeeze it together, if it doesn't feel right slowly add in some water or extra coconut oil until you feel it is right.
  • Take one side of the plastic mould and half fill it with the blue, then over fill the rest of the container with pink, take the other side of the mould and half fill it with the yellow and then over fill the rest with pink.  It's a good idea to over fill a bit so when you push the moulds together the bath bomb will compact.
  • Close the mould by pressing it firmly together and leave it to set in the mould for an hour
  • Carefully remove the mould case by gently tapping on one side, place the bombs on a plate or tray for 24 hours to completely dry out and turn rock hard, then they are ready to enjoy relaxing bath.


Nut free Home made Muesli Bars


2016 is a big year here, our first born has started Kindergarten, which means we have entered the world of packed lunches.  This means I've set out to find tasty snacks that are still on the healthier side of things to pop in the lunch boxes, the kinder also likes the food to be as nude as possible, basically meaning to leave all the packaging at home.  Fruit is a given, it's easy, some of it even comes in it own nifty container, cucumber and carrot sticks are also a favourite with my chickens as is home made easiyo yogurt [I'll be sure to blog about this process down the track!].  I thought that Muesli bars would be a great little companion to the fruit and veg snacks, but I'm not overly keen to spend the extra dollars on sugar filled bars....eeekkkk I'm starting to sound crunchy! Plus this kinder like so many other kindergartens and schools is a nut free zone, in Miss I's class alone there are 4 kids that are potentially anaphylactic.  I've been very lucky so far with my kids and they don't have any allergies, which feels like a miracle considering I'm bloody allergic and intolerant to every second thing I look....OK that's a slight exaggeration! Anyway the point I was getting to is that whatever goes into the lunchbox needs to be nut free and stripped of it package.  So the easiest thing I could think of was attempt to make my known nut free bars.
I have tried to make muesli bars once or twice before, not with great success, but each time I was using maple syrup as the sweetener/binder, and it never seemed thick enough and the bars would crumble, but seeing as these bad boys aren't for my delicate tummy, I could use Honey and this seems to have made a world of difference. I'm not ready to give up on the maple syrup dream just yet so I'll still be working on that!

What you need...

  • 1/2 cup Honey
  • 120 grams of butter or Nuttelex for a dairy free option
  • 1 and 1/2 cups of Rolled oats
  • 1 cup of rice bubbles
  • 1/4 cup dried coconut
  • 3/4 cup dried fruit, our favourite is sultanas
How you do it...
  • Grease a baking tin, I like to use a square 8"x 8" cake tin and pre-heat your oven to 180º C 
  • In a small saucepan over a low to medium heat melt the honey and butter together, once it is melted let it simmer on a low heat for 5 minutes.
  • In a large bowl mix together all the dry ingredient  
  • Carefully pour the honey mixture into the dry mix and using a wooden spoon combine it well
  • Tip the mixture into the tin and press it down firmly.
  • Bake for 12 to 15 minutes, until lightly golden.
  • Let it completely cool in the tin and then place it in the fridge over night or are at least 4 hours, so it has time to set really well.
  • Cut it up into muesli bar sizes and sort them in your fridge in an airtight container for up to 10 days.




Double Choc Peppermint Cookies


Kinder has started here, so I spent the afternoon stocking up the freezer with easy bake cookie doughs.  I figured this will save me some time on days when we feel an after Kinder afternoon treat is in order.  I started off by making my ol' faithful milk chocolate chunk cookies,  and while I was kneading that dough I asked my girls what other kind of cookies they wanted me to make, they decided on choc mint, so I changed up the recipe and came up with these goodies.

What you need...
  • 250 grams of butter
  • 3/4 of a cup of Caster Sugar
  • 3/4 of a cup of Brown Sugar
  • 1 teaspoon of Vanilla paste
  • 1 teaspoon peppermint essence 
  • 1 Egg
  • 1 and 3/4 Cups of Plain Flour 
  • 1/2 cup cocoa
  • 1 teaspoon of bi-carb soda
  • 60 grams of cooking chocolate, either chips, buds or from a block roughly chopped up.

How you do it...
  • First soften your butter, the easiest way to do this is to leave it out on your kitchen bench for an hour or so, but if you don't have the time, you can give it a quick zap it in the microwave, but be careful not to melt it.

  • In a large bowl using a hand mixer or a mix master, cream the softened butter on medium speed with both sugars, the vanilla paste, peppermint and the egg until you get a nice smooth creamy consistency.
  • In two batches add the flour, cocoa and baking soda, and mix well.
  • Now mix in the chocolate, you can do so by hand mixing with a  wooden spoon, or be lazy like me and just throw in all in with the second batch of flour and let the mix master do the heavy lifting.
  • Turn the dough out onto a well floured bench and give in a good knead.
  • Roll it out into a long log, the amount of cookie dough you want to bake straight away gets  wrap in cling film and popped in the fridge for 20 minutes, this makes firm and easy to cut into disks for baking.  The rest of the dough can be cut into smaller logs, placed in a freezer bag, labelled and frozen. They take under an hour to de-frost so are also great to have when visitors pop over.
  • When you are ready to bake, cut into cm slices and bake for 8 minutes on 190º C. Let them cool on a wire rack.
  • Enjoy.


White Choc Cake Pops


I made this yummy cake pops For my little Queen B's first birthday celebration,
 they were a huge hit and I really loved making them. 
I think they are definitely ready to be placed on the permanent party food list!! 

What you need...
  • A day old vanilla cake, I cheated and made a Betty Crocker packet cake.  FYI I just discovered you can buy Betty Crocker cake mixes in bags not just boxes...It's cheaper and you don't end up with unwanted frosting. 
  • 2 blocks of white chocolate
  • 1/4 cup of cream 
  • A bag of Wilton candy melts
  • Copha
  • Sprinkles and Wilton glitter dust for decorating
Speciality Tools 
  • Microwave safe bowls
  • Cake pop sticks
  • Florist block or polystyrene block to hold the cake pops upright.

How you do it....

  • Break the cake up into a bowl, by rubbing the cake pieces together you will get a fine crumb quite quickly.
  • Make a white chocolate ganache* by placing 200grams of white chocolate and 1/4 cup of cream into a microwave safe bowl. Zap it for 1 min, take it out and give it a good stir then zap it again for another min.
  • Pour the ganache into the cake crumb, give it a good mix with a  spatula or wooden spoon, then a quick kneed with your hands.
  • Start forming the balls by picking up some dough, giving it a squeeze and then rolling it in your hands. Place them onto a baking tray or plate.
  • When you have made all your balls pop them into the fridge for 20 mins to firm up
  • Melt about 50-100 grams of white chocolate from your second block and quickly eat or hide the rest before your kids see it!  I melted it in the microwave in 1 minute intervals, stirring after each 1 minute. 
  • When it is fully melted take out the cake balls and your cake pop sticks, dip one end of the stick into the melted chocolate and place a ball onto that end of the stick.  When the chocolate is set it will help keep the ball and stick as one!
  • Pop them back into the fridge while you get the candy melts ready for dipping.
  • In a microwave safe bowl pop 200 grams of candy melts and 40 grams of copha, note, this may not be enough to cover all your cake pops, but it is better to melt it in batches.  Melt the mixture in the microwave the same way as the white chocolate, in 1 minute intervals, stirring after each minute.  
  • Once melted pour into a deep cup.
  • Only take a few pops out of the fridge at a time. One at a time dip the pop into the candy melts,  still holding it over the cup slowly turn the pop so excess dips off. *Tip* lightly tap your wrist to help the excess come off
  • If decorating with sprinkles dip into a little bowl of sprinkles while still slightly wet, then place in an upright position, this is when the florist block come in very handy.
  • If decorating with the glitter, let them dry fully first before dusting them with a small brush.
Keep in a airtight container in the fridge for a couple of day.

*ganache works better than other icings and butter creams because it will set firmer.

What my full video here, remember to like, and subscribe to my channel.


SITE DESIGN BY DESIGNER BLOGS